

First Aid Guides
Pressure immobilisation
A bandaging method for treating some bites and stings
Pressure immobilisation involves bandaging the wound firmly to squash the nearby lymph vessels. Slowing the movement of venom through the lymphatic system. The lymphatic system is a network of tubes that drains fluid from the body's tissues and returns it to the bloodstream.
Immobilising the bitten limb also slows the spread of venom. You can do this by keeping it still and splinting the limb.
The pressure immobilisation method is useful for some bites and stings, but not all.

Use pressure immobilisation for:
- Australian venomous snakes bites (including sea snakes)
- Funnel web spiders bites
- Blue-ringed octopus bites
- Cone shell stings

Do not use pressure immobilisation for:
- Spider bites (other than a funnel web spider)
- Jellyfish stings
- Stonefish and other fish stings
- Bee, wasp and ant stings
- Scorpion and centipede stings
Using pressure immobilisation
Follow the steps below to use the pressure immobilisation method.
Call Triple Zero (000) in an emergency involving a venomous bite or sting. If you aren't sure, make the call and have the situation assessed.
If the person collapses, loses consciousness or stops breathing, follow the DRSABCD Action Plan.
Step 1
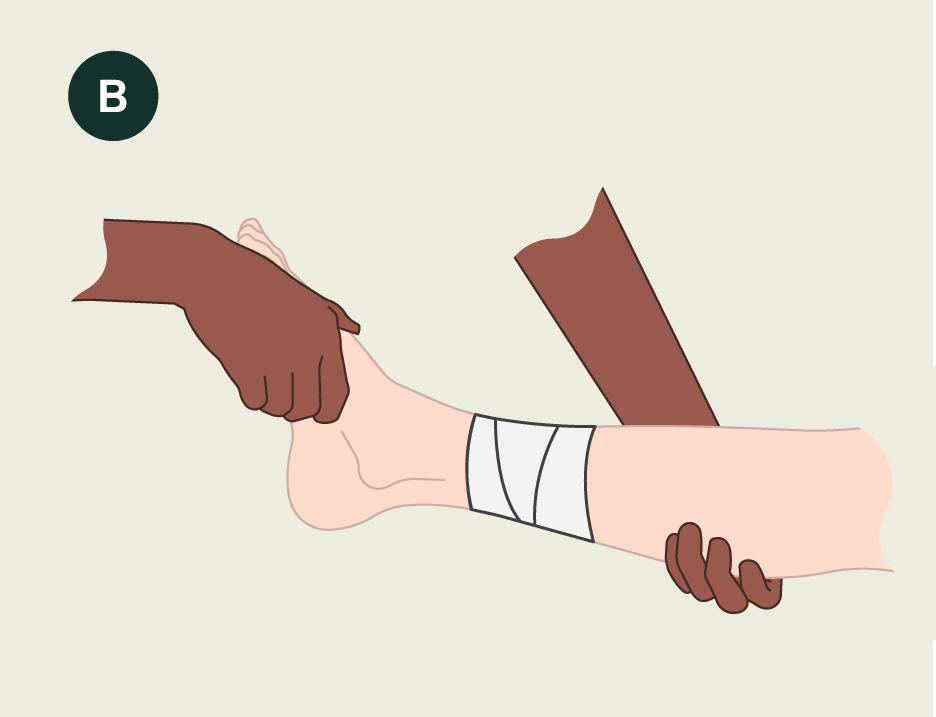
Firmly bandage the bite site directly with a compression bandage. You don't need to remove cloths. Clip the end of the bandage or tuck it underneath the final loop.
If there aren't bandages available, use clothing, towels or fabrics.
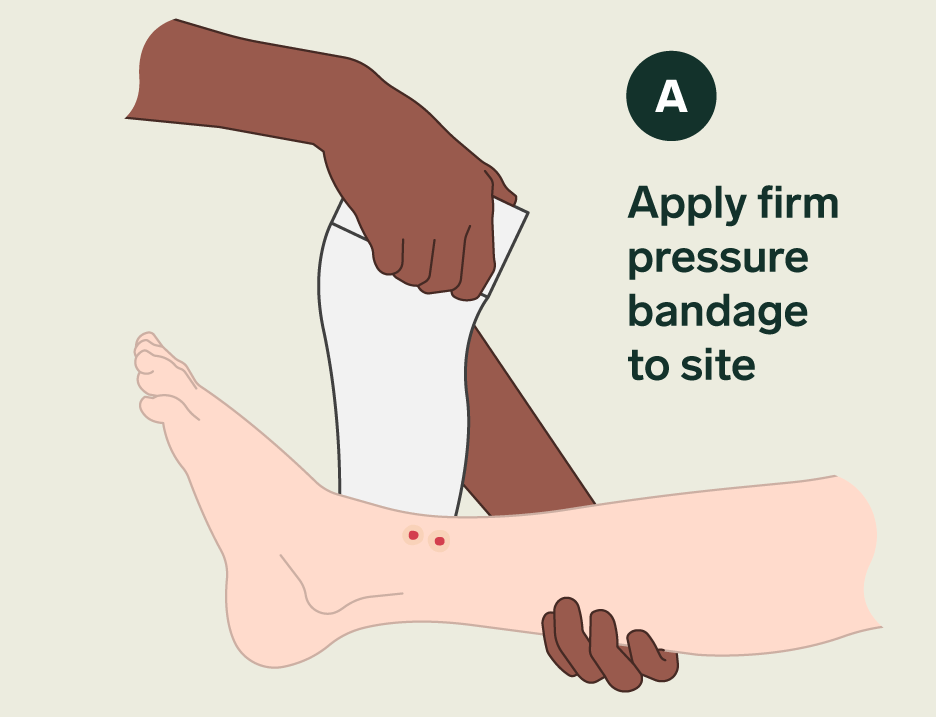
Avoid wrapping too tight to cause numbness, tingling or any colour change to the limb, toes or fingers.
Check circulation by squeezing the edge of the big toe or thumb for 3 seconds. Release and see if the colour returns - it should return within 2 seconds.
Step 2
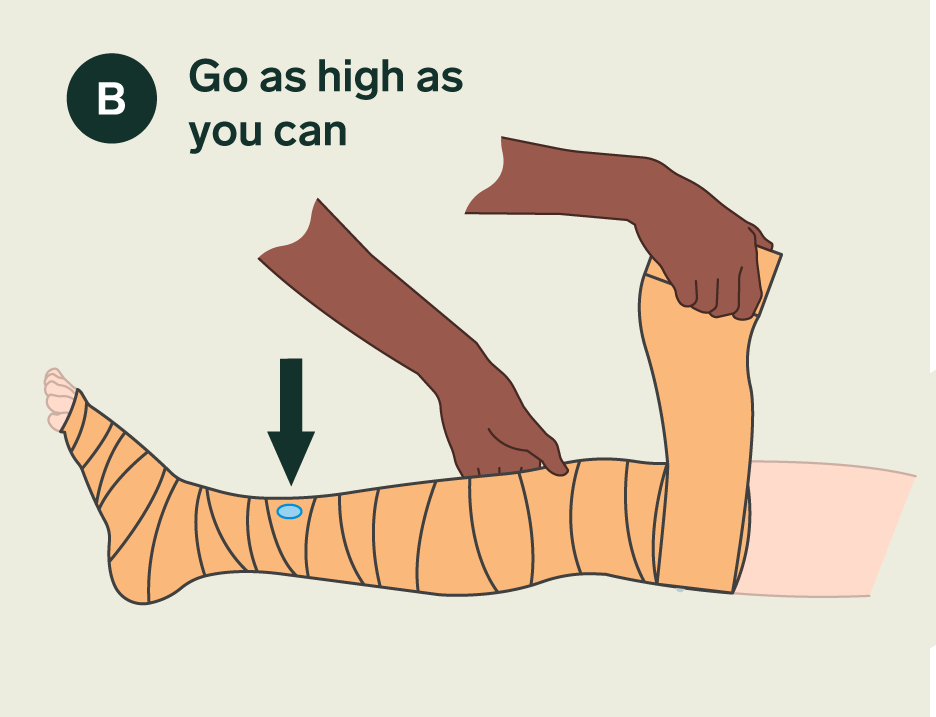
If the bite is on a limb, apply a second firm compression bandage starting just above the fingers or toes. Wrap the bandage upwards on the limb as far as you can. Clip the end of the bandage or tuck it underneath the final loop.
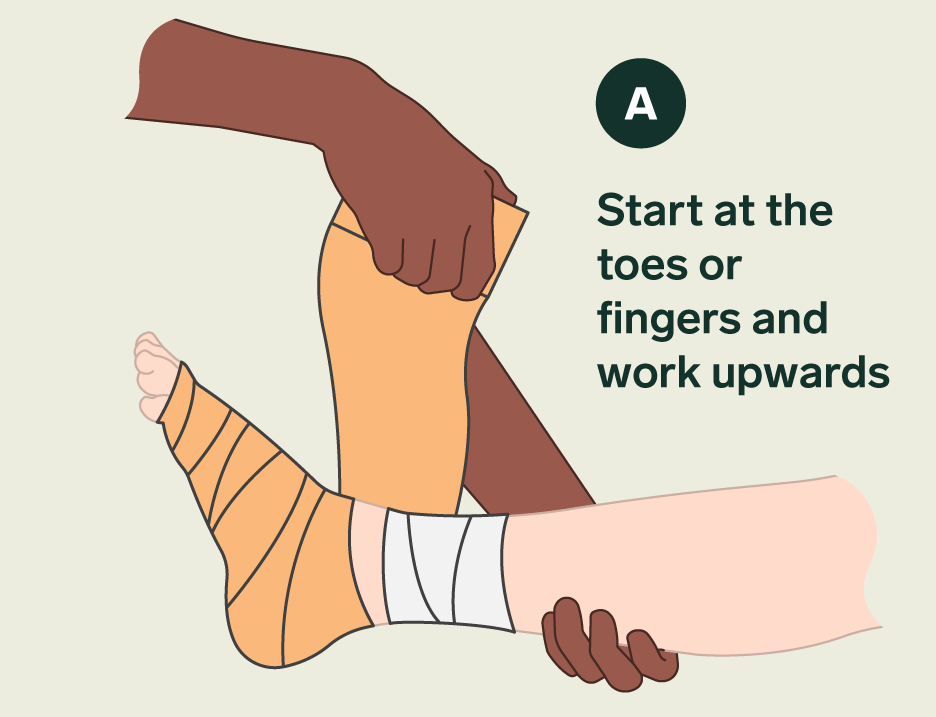
Avoid wrapping too tight to cause numbness, tingling or any colour change to the limb, toes or fingers. Remember to check circulation.
Mark the bite site on the bandage.
Step 3
Apply a splint if bitten on a limb.
If you have a splint board, tie it at the ankle, then above and below the knee. If the bite is on the arm, place it underneath the forearm.
If you don't have bandages for tying, you can use long bits of fabric such as a t-shirt or towel.
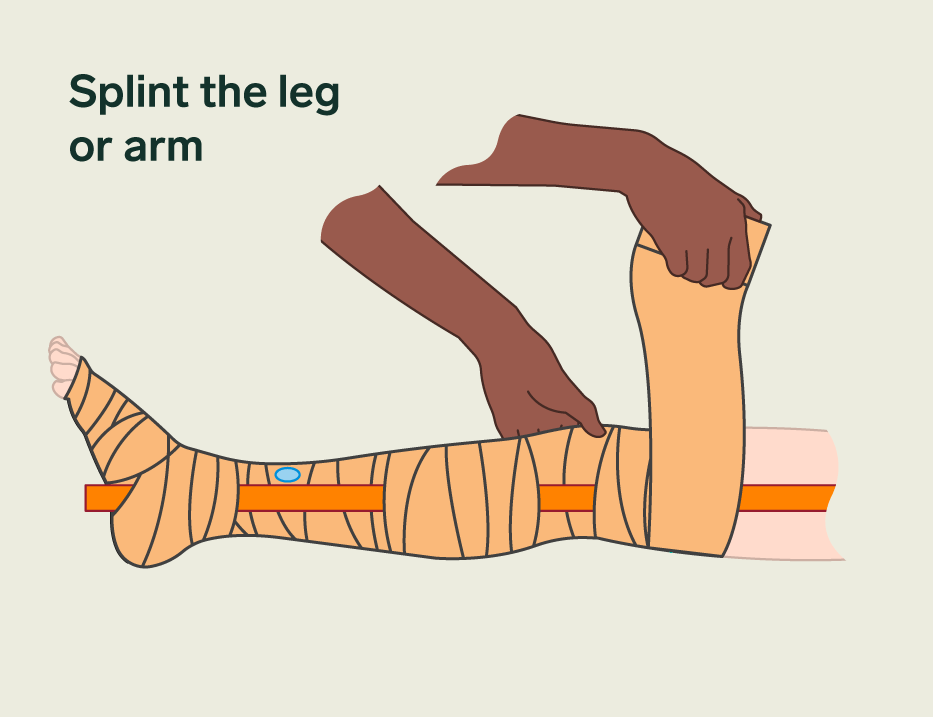
If you don't have a splint board you can:
- Bite is on the leg: splint by placing the legs together and tie them to each other with bandages. Once below the knees and again at the ankles.
- Bite is on the arm: make a splint and place it underneath the forearm. Then, tie or tape it to the arm at the wrist and just below the elbow. Place in a sling
Step 4
Write down the time of the bite and when you finished bandaging. This will assist medical help later.
If they become cold, cover them with a blanket, towel or clothes.
Check circulation periodically by squeezing the edge of the big toe or thumb for 3 seconds. Release and check if the colour returns - it should return within 2 seconds.
Monitor the person closely. If they lose consciousness at any time, follow the DRSABCD Action Plan.


